The RoiBot Web Hosting File Manager
A File Manager filled with all of the tools you may need
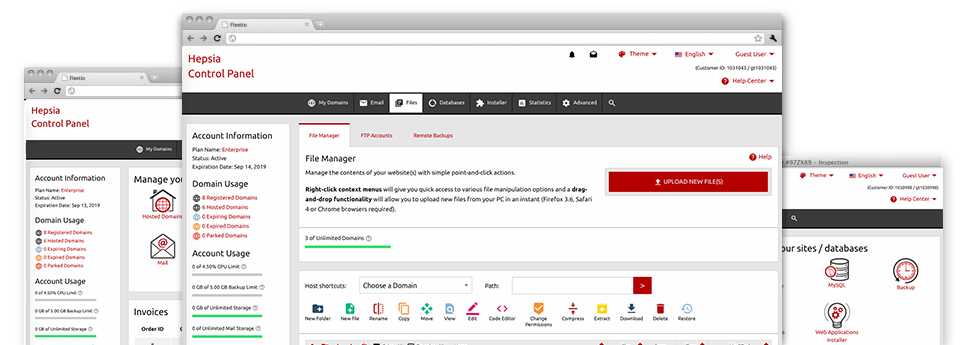
With the RoiBot Web Hosting Hosting Control Panel, you’ll have access to our feature–rich File Manager. It will make it easier to speedily handle your web sites without the need to make use of an FTP tool. You can add files over a risk–free connection by simply dragging them into the browser. In addition, you can rapidly archive and unarchive files and folders, set up password–protected areas, change file permissions and so much more. Take a look at the functions contained in our File Manager.
Drag ’n’ drop file upload options
Transmit data files to your webpages with ease
The File Manager in your Hosting Control Panel boasts a rapid, drag–and–drop feature that will assist you to transfer data files between your computer and your hosting profile without needing to use an FTP tool. You can easily drag data files from your computer and drop them in your Hosting Control Panel with a mouse–click by using a safe SSL connection.
The drag’n’drop characteristic is included in the Hosting Control Panel, so you don’t need to install any third–party software package to work with it. It also works well on all leading Operating Systems, so all you need to do to make use of it is log into your File Manager.
Right–click context menus
All of the file managing choices at your fingertips
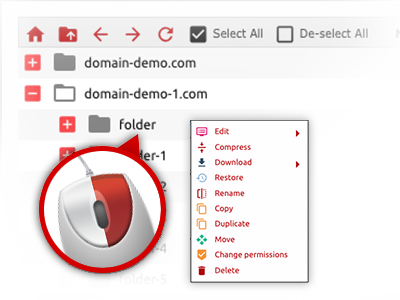
We have aimed to make your File Manager as easy–to–use as feasible, so you can easily make adjustments to your files. Apart from the common command bar near the top of the page, we have also included right–click context menus with all the fundamental file management options. Simply click on a file or directory and choose the activity you want through the list which will turn up.
You’ll be able to rename, copy, move, download, edit, preview, archive, unarchive and delete any file or folder you decide using a click of the mouse. Should you click on a folder, it’s also possible to set up a brand new folder or file inside it.
The right–click option is also available whenever you pick different files or folders at once.
Archive/Unarchive files
Deal with huge files easily
Thanks to the built–in archive/unarchive solution, the File Manager makes it possible for you to work with big files without the need to use FTP. You’ll be able to reduce the size of a folder to a compact size by clicking on the Compress button or access the belongings in an archived folder through the Extract button. When compressing a folder or a bunch of files, it is also possible to choose the archive extension (.ZIP, .RAR or .TAR.GZ) as well as the name of the archive file.
Integrated file editors
Absolutely no third–party software packs are required
We’ve enclosed a couple of file editors inside the Hosting Control Panel to assist you come up with easy and quick adjustments for your files without needing to employ third–party applications. With the File Manager you will find a WYSIWYG editor that can help you monitor any changes which you come up with right away, a code editor that boasts syntax emphasizing for your personal .PHP or .JS files, and also a plain text editor for more expert customers. Any changes which you create and save will be demonstrated immediately online.
You can access the file editors making use of the buttons near the top of the file table and also by right–clicking a given file/folder.
A logical folder structure
All your files organized in user–friendly manner
All the files inside your web hosting account are organized into directories. Each web host features its own main directory, that follows the file structure that you have pre–set. In this way, it is very easy to maintain all your hosts from a single location without any risk of becoming lost or perplexed.
By default, you’ll see all of the hosts indexed in a table and if you mouse–click once on a given host, you will observe each of the sub–folders and files associated with it. By clicking two times, you will visit a page which is focused entirely on that host only. An additional way to load the folder associated with a certain host and then to use it exclusively, is to try using the drop–down menu at the top of the main File Manager file table.
A user–friendly interface
Take care of your data with a click of the mouse
The RoiBot Web Hosting File Manager has been made in such a manner to help you feel like using the services of the file explorer on your personal computer. It boasts an option to drag your files and then to drop them in a desired location and shows all the obtainable modification options after clicking the right computer mouse button. In addition, the tool includes an internal file preview option and various file editors that can help you modify your files in real time from your Hosting Control Panel.
Also, we have provided a group of file management articles and how–to video tutorials to guide you rather quickly find out how to work with the tool.
Work with multiple files
Change multiple files at the same time
When using the RoiBot Web Hosting File Manager, it’s possible to pick out a lot of files or folders like you do on your desktop computer or notebook. Just hold down the Control (Command for Apple’s Mac OS) key and click on the desired files/folders. If you would like, to pick a large amount of files/folders at once, simply click a single file/folder, hold down the Shift key and then click any other file or folder.
Once you’ve picked each of the files that you need, it is possible to drag them into a pre–selected location, or take advantage of the right–click contextual menu to see a summary of the available actions.
Quick & simple password protection options
The easiest method to take care of your data
There’s one common route to shield a folder with a password – by creating an .htaccess file. If, however, you aren’t technologically experienced sufficiently, you will have trouble executing it all by yourself. To help make things simple, we’ve included a time and effort saving password protection interface to the File Manager accessible in the Hosting Control Panel.
To use this option, simply right–click on a folder and pick Password Protection. Following that fill in the login name plus the pass word that you’d like to work with and then click on the button. That’s it. The chosen folder will be hidden from the public eye and will be accessible to previously approved users.
